How to choose the right grout for your tile
A Practical Guide
Grout is usually never given much thought but this is a mistake. If you accidentally choose the wrong grout, it can be a nightmare to fix later on. This guide will make sure this doesn’t happen to you. So, let’s get started.
We will follow four easy steps:


FUNCTION
Before we decide on anything else, we must first consider what functionalities we would like our grout to offer us.
Avoiding this step is usually the reason people end up regretting their selection.
Where will the grout be placed?
It is important that we take into account where our grout will be to match its demands.
For Wet Areas (bathroom floors or shower walls):
Use epoxy or high performance cement grouts for mold resistance.
For General Floors:
Choose a grout based on foot traffic and maintenance preferences. High performance cement and ready to use acrylic offer stain and crack resistance. Sanded cement is a budget friendly option that works great for wider joints.
For Backsplash:
Make sure to choose a grout with stain resistance like acrylic or high performance grouts.
For Delicate Tile (glass, marble, enamel):
Avoid sanded grouts because it can scratch the surface.
Do you want a low maintenance grout?
If you want a low maintenance option, you may want to stay away from light colors and invest a little more for non-porous grout. The best low maintenance options are epoxy, acrylic, and high performance grout.
Do you prioritize durability?
Again, the top choices for durability are epoxy, high performance, and acrylic grouts.
Do you want a timeless look?
If you are striving to achieve a timeless look, make sure to stay away from trendy looks and crazy colors. Instead, choose colors that blend into your tile.
The above are only a few examples of some questions you can ask yourself.
It’s okay to not have all the answers at this stage. Just go ahead and list out any other functionalities you want your grout to offer that will work with your lifestyle. These will be your non-negotiables. From now on, any grouts you look at will need to have the functionalities you listed. This will help narrow down your options.
Grout Lines
Our next step is to consider our grout line.
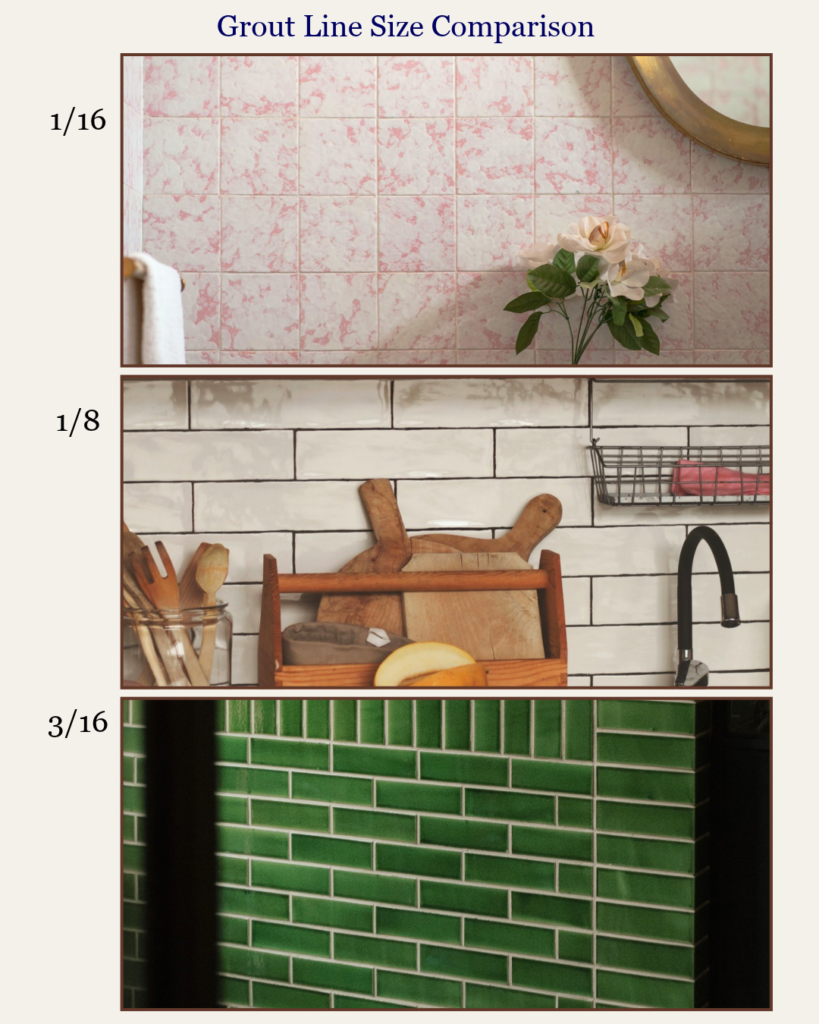
pick a grout line
Most Common Grout Lines:
1/16 Joint (thinnest)
- Great for mosaics, smooth walls, rectified porcelain & ceramic tiles
- Creates a seamless look because of the smaller grout line
- Does not offer enough room for variation in size of the tiles
- Requires unsanded grout
⅛ Joint (Standard)
- Standard floor tiles, natural stone, high moisture areas
- Typically uses sanded grout for more strength and crack resistance
- Needs more upkeep and can get dirty faster
- Traditional look
3/16 Joint (Wide)
- Can be used for non-rectified ceramic & porcelain tile
- Emphasizes bold grid patterns
- Typically uses sanded grout
- For small spaces, it can make it look smaller
Grout usually goes a long way, so for most home projects, just one bag will do the trick. Your tile installer will be able to double check this for you. For DIYers, keep in mind that every product is a bit different, but each bag includes a guide to help you calculate how much you need based on your square footage, tile size, and grout joint width.
After choosing your grout line, we can move on to our next step.
Grout Types
It is crucial we take into account our list of functionalities from step one at this stage.
This step is especially important if you are installing the tile yourself. You must know the 4 most common types of grout used to find which is perfect for you.
The most economical and common grout type. Mix with water.
Sanded Cement Grout:
Grout Line: 1/8 inch or wider. The sand adds strength which helps prevent cracks.
Used For: Floors with heavy foot traffic and walls with larger joints.
Caution: Avoid using on scratch sensitive tiles (polished marble, glass, polished metal, or delicate glazed ceramic) as the sand can scratch the surface.
Unsanded Grout:
Grout Line: 1/16 to 1/8 inch
Used For: Vertical surfaces (bathroom walls, kitchen backsplashes) and delicate tiles (polished stone,glass, high-gloss ceramic).
Caution: Shrinks and cracks if used in joints wider than 1/8 inch because it lacks sand structure.
Maintenance Considerations For Both:
- Highly porous and prone to moisture absorption, mold growth, and staining.
- Must be sealed 48–72 hours after installation and resealed every 6–12 months.
Think of high performance cement grouts as a middle ground between basic cement grout and epoxy.
Pros:
- Can fill both narrow and wide joints without shrinking, cracking, or scratching delicate tiles.
- Water resistant and flexible
- Stain & Efflorescence Resistance
- Cures rapidly
- Many brands feature integrated sealers so it doesn’t require any additional sealing.
Used For:
Interior/exterior floors and walls, wet areas (shower floors/walls), pool waterlines, and residential high traffic entryways.
Caution:
- Has a short 20-30 minute window to apply it.
- More expensive than standard cement grout.
The most durable, commercial grade option. Made from a resin and hardener mix.
Pros:
- Very durable. Will not crack, chip, or erode under severe wear.
- 100% Non-Porous. Completely waterproof and stain resistant without needing any sealer.
- Resists harsh cleaning chemicals, grease, and acids.
Used for:
Shower floors, steam showers, wet rooms, commercial kitchens, pools, and high traffic areas.
Caution:
- Cures very quickly and leaves a stubborn residue on tile faces if not cleaned immediately while installing.
- Can yellow over time if exposed to direct outdoor sunlight.
- Significantly more expensive than standard cement grout.
Ready-to-use grout supplied in tubs. Requires zero mixing or water addition.
Pros:
- Flexible & Crack Resistant
- Eliminates mixing errors. Excess grout can be saved in the tub for future touch ups.
- No Sealer Required
Used for:
Kitchen backsplashes, shower walls, tub surrounds, and residential interior floors.
Caution:
- Unsuitable for swimming pools, hot tubs, or steam rooms.
- Requires proper dry time before exposure to heavy water flow.

Once you have selected the type of grout you will be using, we are now ready to move on to our most exciting and final step.
Style
Use the guide below to help you decide your style and color.
Grout Lines Used in Different Design Styles:


Before we continue, I’d Like to preface by saying this:
There are no real rules to this; only guidelines. You are the only one who gets to decide what looks good in your space. If it makes you happy, go for it.
Choose Your Color:
When selecting a grout color, there are two primary design approaches.
You can choose a color that blends well with the main color of your tile
OR
You can select a contrasting grout color
Keep In Mind: Dark grout is super forgiving because it hides stains easily. Lighter grouts look bright and crisp, but they’ll require a bit more maintenance to stay that way.
↓↓↓
Blended grout gives you a seamless look making your space appear larger
- It’s timeless and classic
- Interesting patterns and shapes in tile can get lost with a blended look
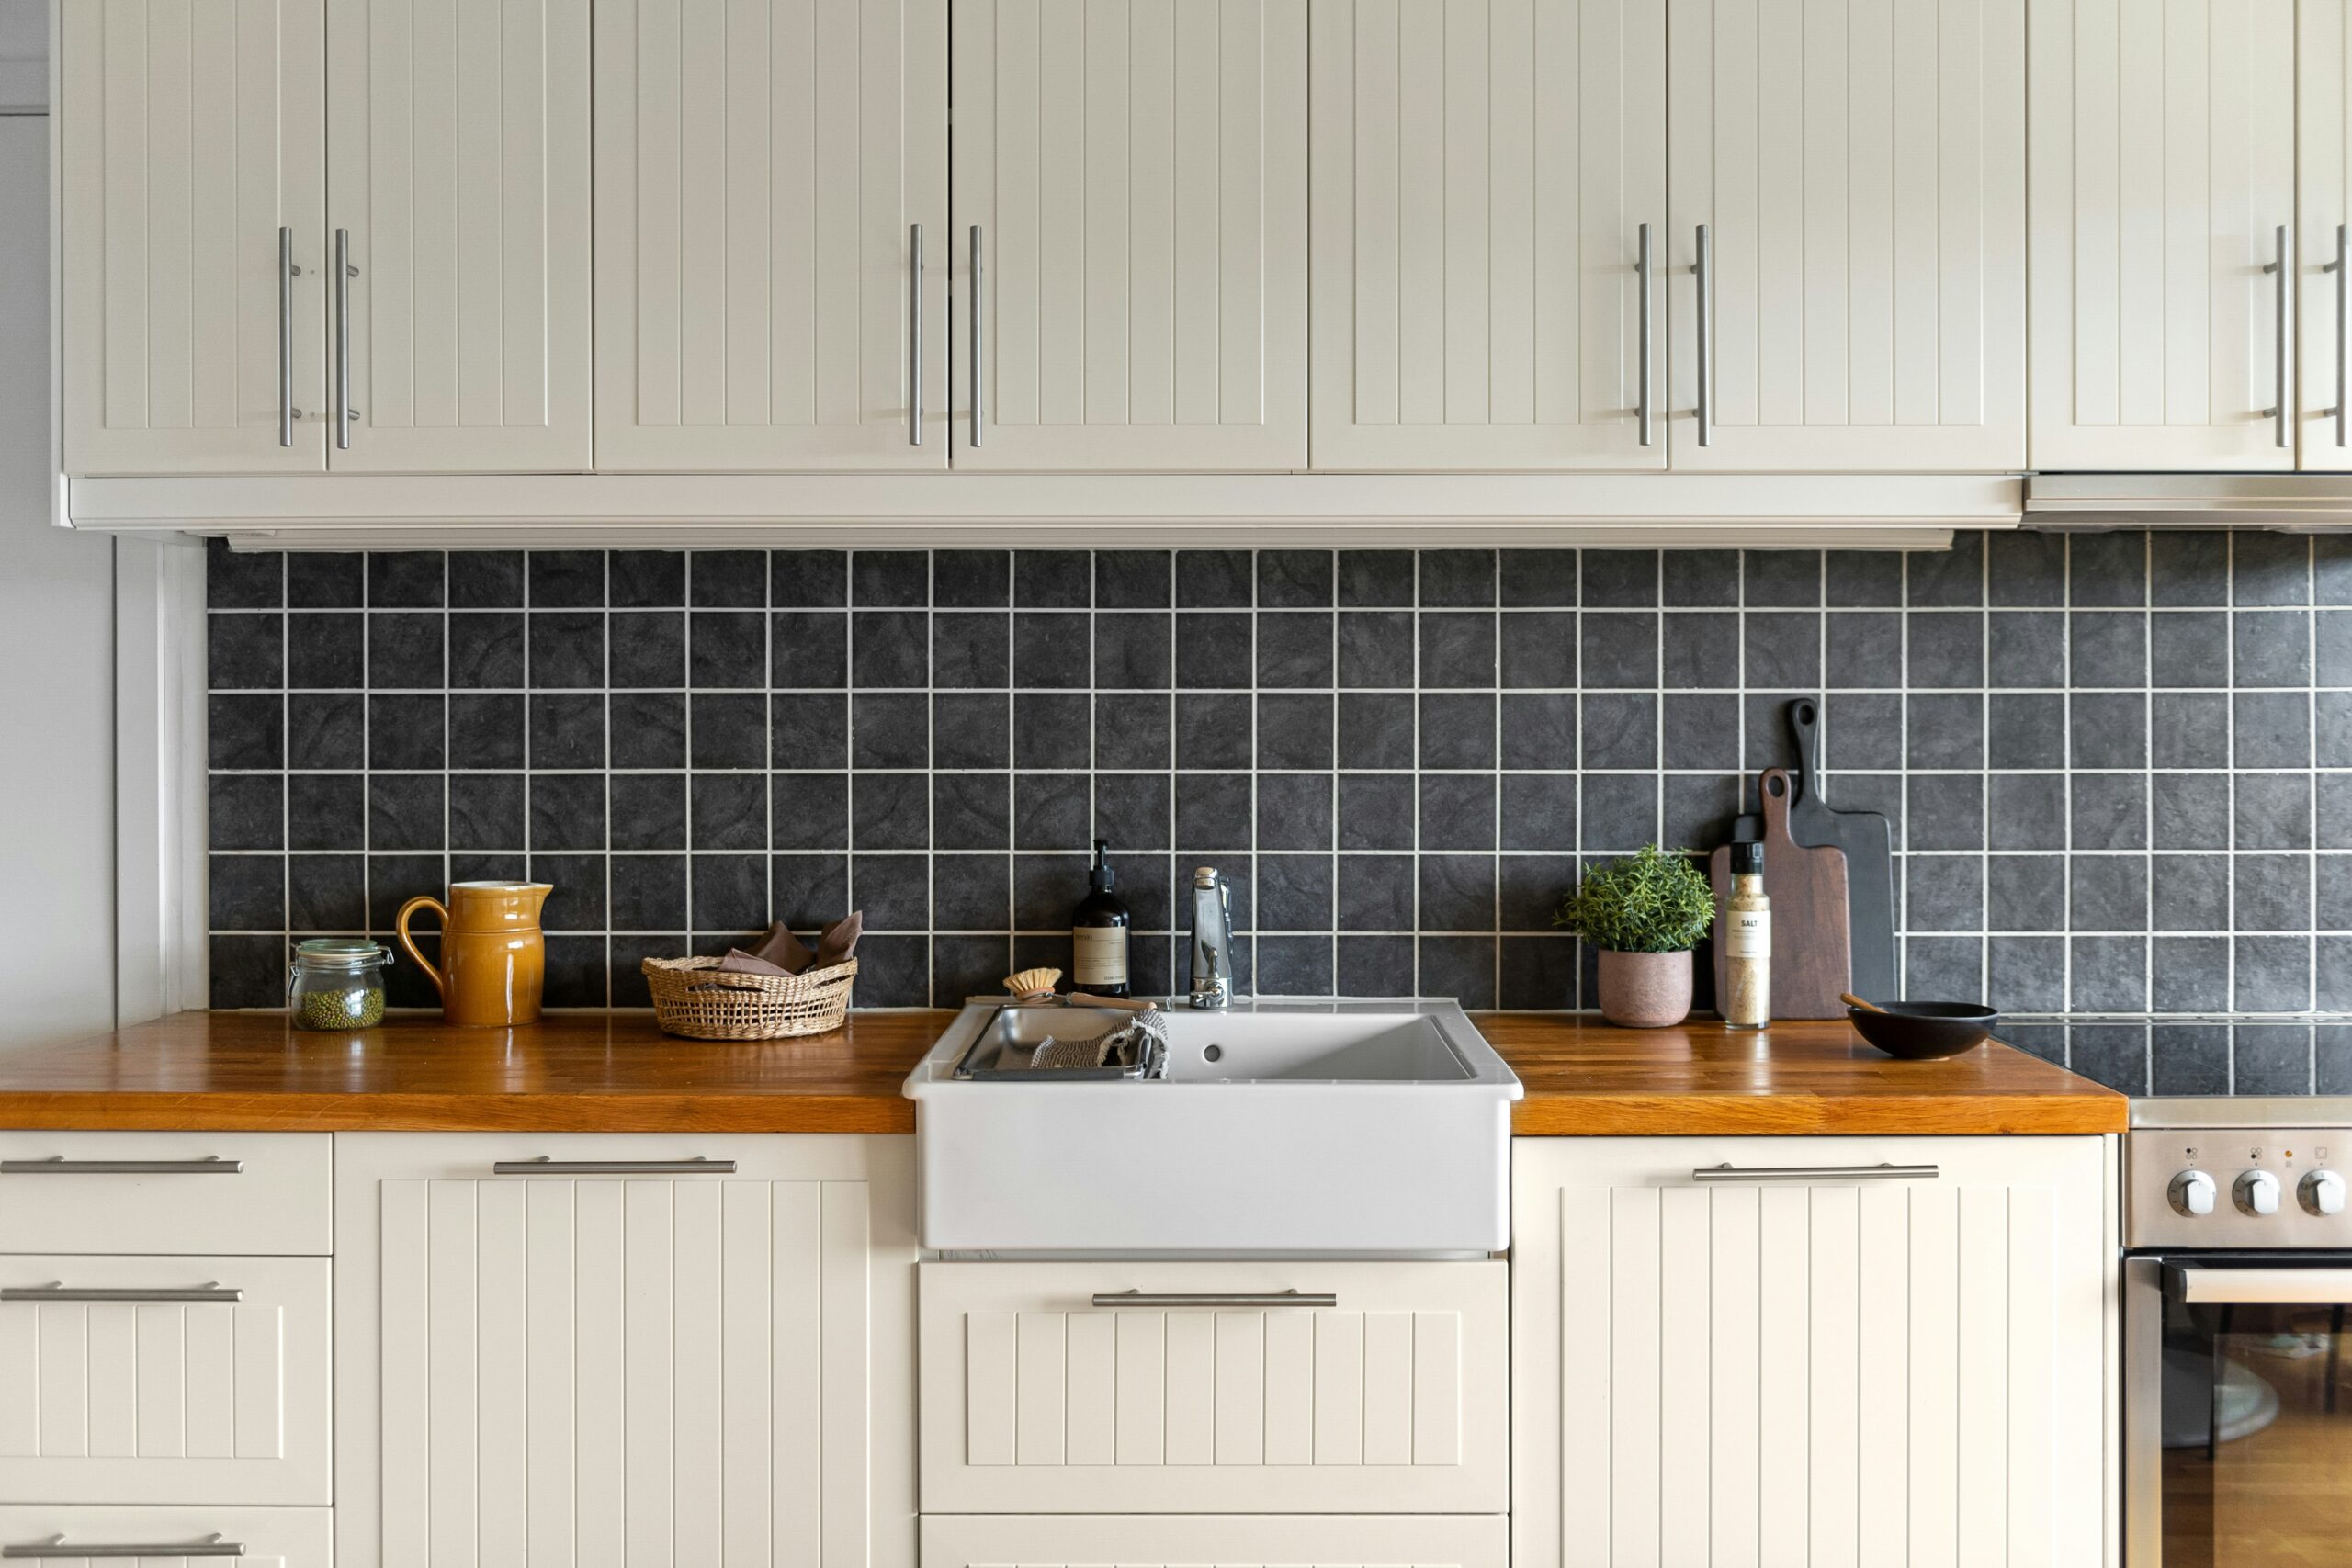
Contrasting grout highlights the shape and pattern of the tile making it stand out
- It creates a focal point with your tile
- Depending on the pattern of your tile, it can look busy
- Looks bold
- It’s more trendy and may look dated after a while
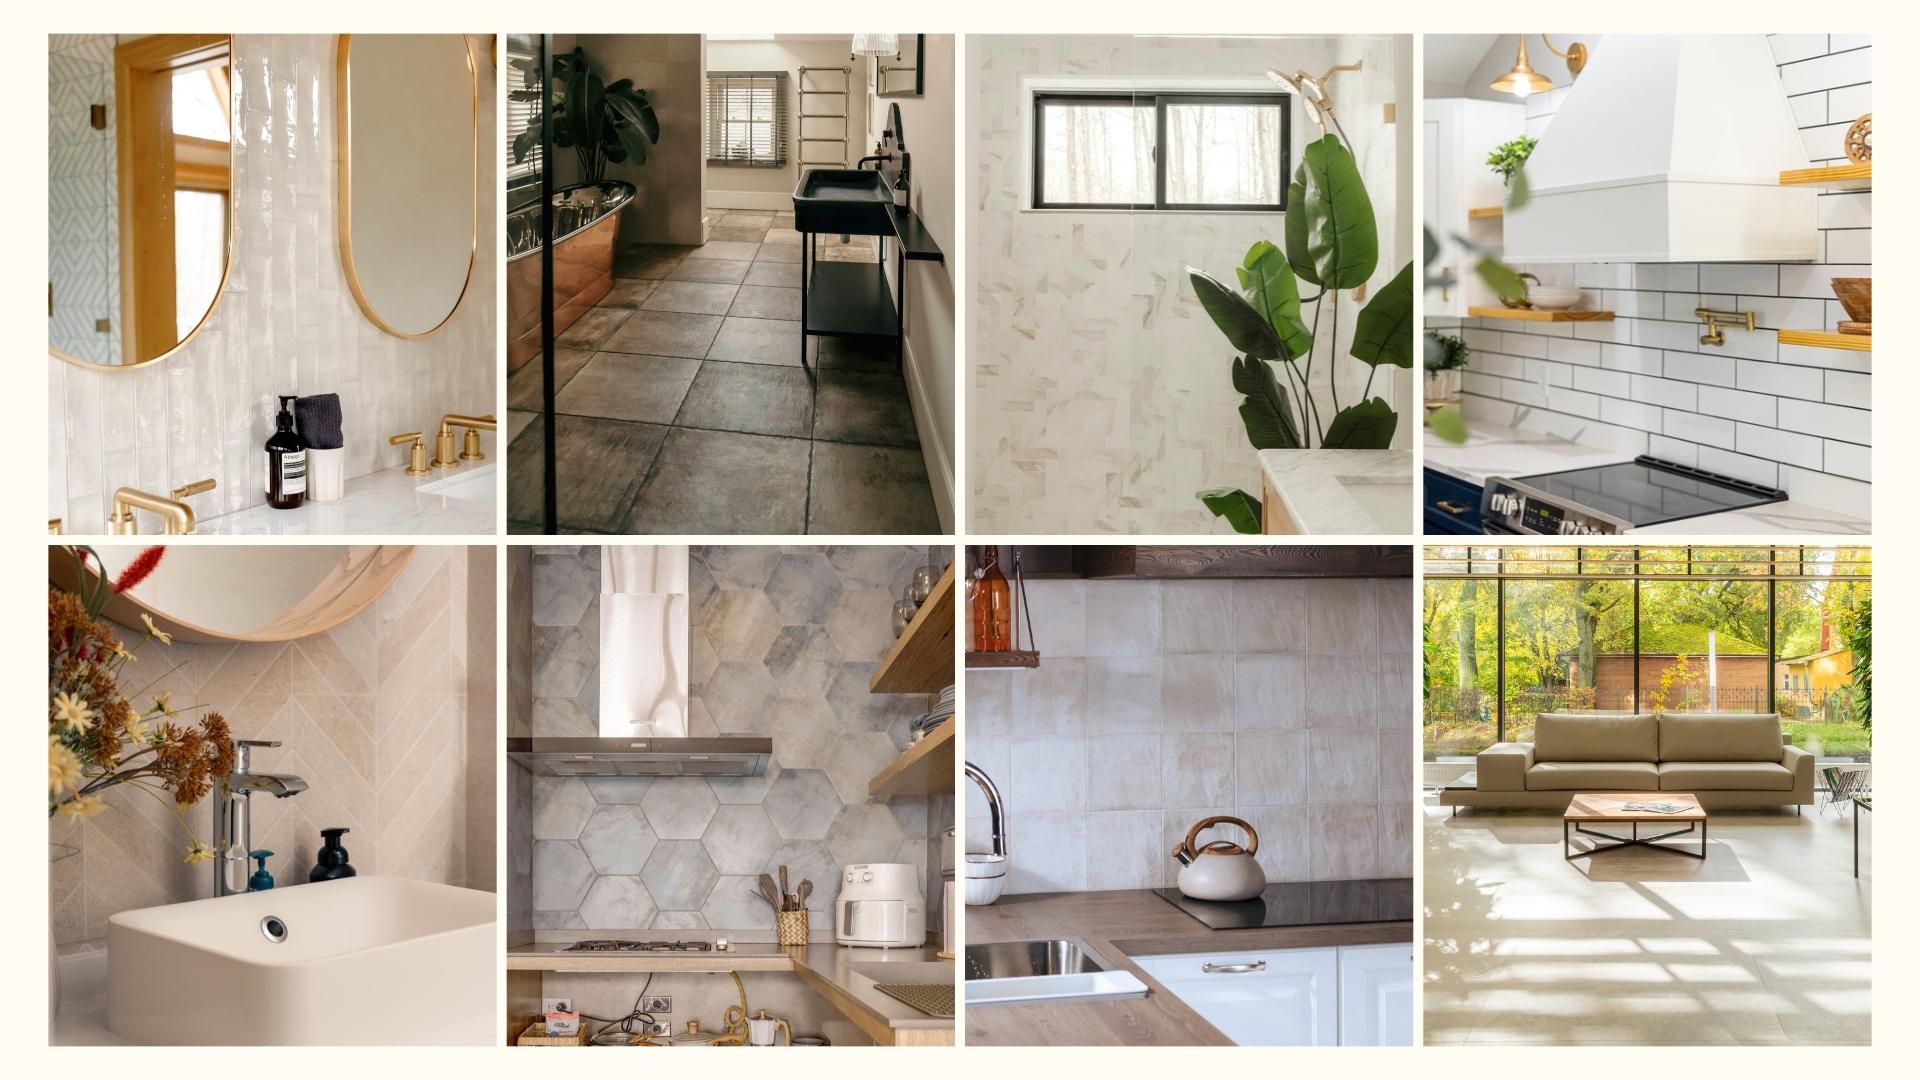
Here are some inspos: